Pacman Frog Tank Setup Guide (With Pictures)

In this setup guide, I’ll show you how to turn a front-opening glass tank into a suitable habitat for a Pacman Frog. You can use a UTH (Under Tank Heater) or heat bulb. For me, I’m using a heat bulb with a thermostat!
By the way, this isn’t a Pacman Frog care guide, it’s merely tank setup instructions. And there is more than one way to create a habitat! This is just one.
The next section covers the basics requirements for Pacman Frog habitats. If you already know, feel free to skip it!
Table of Contents
Requirements for a Pacman Frog Enclosure
Pacman Frogs most often need supplemental heating, increased humidity, and lighting. They’re from the Ceratophrys genus, which is native to South America. They’re found among the soil and leaf litter on the floor of subtropical, broadleaf forests.
UVB is not required but may provide some health benefits to non-albino Pacman Frogs. Regardless, here are the items you’ll need to create a successful habitat.
- An enclosure (glass aquarium, front-opening terrarium, etc) 10-gallon minimum
- Heating element (UTH or Heat Bulb)
- Thermostat (for the heater)
- Lighting (for a day/night cycle)
- Loose substrate
- Water bowl *optional but recommended
I recommend a temperature range of 65 °F – 82 °F. The lower end during the nighttime hours and the higher end is a day-time high. Humidity between 50% – 75% and a photoperiod of 12/12. That means you’ll need a spray bottle for misting the enclosure in order to raise the humidity, a light, preferably set on a timer, to provide day and night hours.
That’s a quick overview of the basic requirements. I strongly encourage you to check out my Pacman Frog care guide for more details!
Pacman Frog Tank: Step by Step Guide
For those of you interested in the products I used, I’ll list them at the bottom of this page for your convenience. Now then, let’s get started.
Step 1.) Place the Heat Mat (if you’re using one)
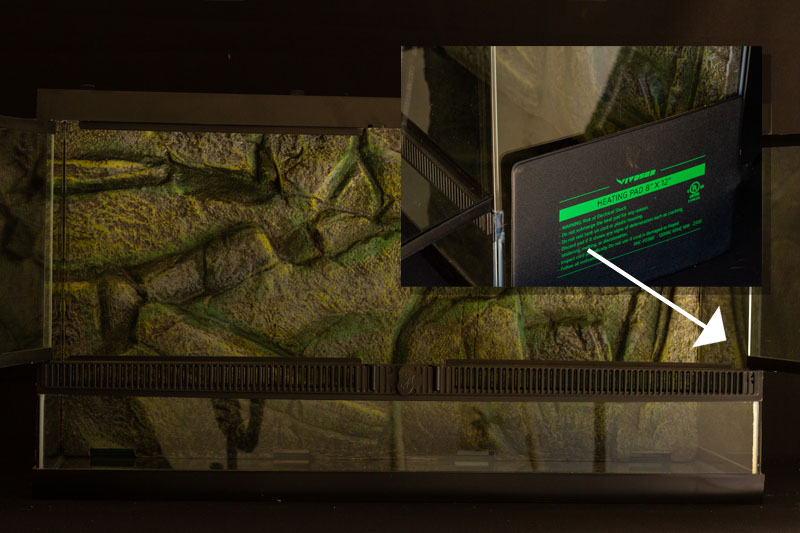
For those of you using a heating pad, the first thing to do is to place that. Avoid sticking the UTH (Under Tank Heater) under the habitat. The reason for this is because Pacman Frogs often burrow into the substrate, getting dangerously close to the heating pad. Getting too close to the UTH can cause problems.
I didn’t use a UTH for this build, as you’ll learn in the following steps. I did, however, take a picture to show you all where to place a heating pad in case you decide to use one!
By the way, don’t plug in the heating mat yet. Let’s wait until the build is finished.
Heating Pad Size & Watt
The heating pad size you need is often based on the size of the enclosure. Zoo Med, Zilla, and Fluker’s make very similar heating pads in which the wattage is either 8 or 7 and the recommended tank size is 10 – 20 gallons.
Other brands, like the Vivosun heating pad shown in the picture above, aren’t based on tank size. In this case, it should be between 7 – 10 watts for a tank between 10 – 20 gallons.
Because Pacman Frogs mostly burrow into the substrate and rarely move, having a large tank isn’t required. However, if you decide to go with anything bigger than 30-gallons (18″ x 18″ x 18″), you’ll want to get a bigger heating pad.
Step 2.) Add the Substrate
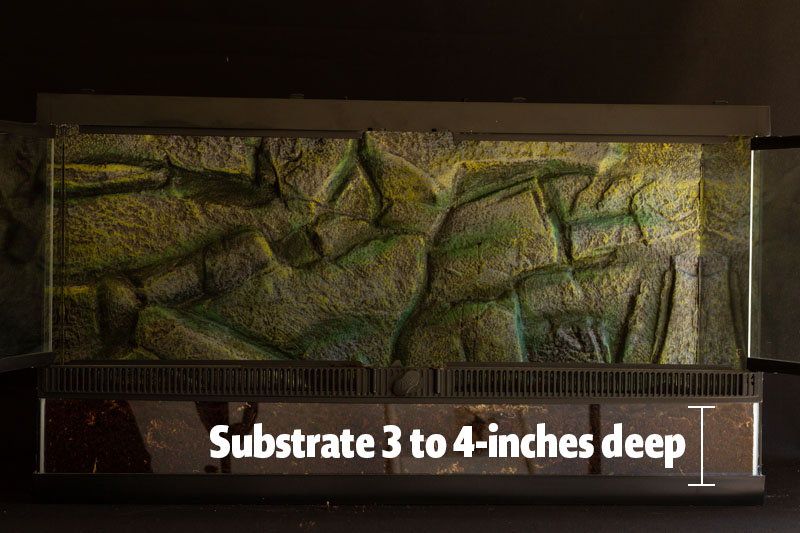
The substrate you use largely depends on what type of setup you’re going for. For an enclosure using fake plants, for example, can use coco-husk fiber; Eco Earth, Plantation Soil, Tropicoco, etc.
For more sophisticated setups in which living plants and possibly microfauna, you’ll want to use an ABG mix or some type of a loose substrate that feeds your plants. I used a mixture similar to ABG, containing some Eco Earth, Peat Moss, Sphagnum Moss, Fern Fiber, Charcoal, and a few other things. I don’t recommend making your own substrate unless you’ve done plenty of research on the topic!
The reason you need to change the substrate in a non-bioactive setup is that the acidity level becomes dangerous highly over time. The acidity level raises as your Pacman Frog urinates and defecates.
In a bioactive setup, the plants and microfauna would serve as a means of cleaning the acidic droppings, making the substrate more suitable for your inhabitant(s).
Drainage Layer
Drainage layers are used in builds with high humidity, especially if you’re using an automated misting system. This is important if you’re doing a bioactive setup where the substrate won’t be changed often.
I chose not to use a drainage layer for the sake of simplicity. In hindsight, I wish I would have made a drainage layer for the sake of showing you! However, it’s a fairly simple process.
To create a drainage layer:
- Fill the bottom approximately 1-inch deep with clay pebbles (hygroballs, false bottom, etc) or matala filter media.
- Place a mesh screen layer on top of the clay pebbles or matala filter media.
- Put your substrate on top of the mesh screen layer.
The purpose of a drainage layer is to allow excess water to drain through the substrate. This keeps your substrate from sitting in water, which can lead to an unhealthy environment.
Step 3.) Water Dish (optional)
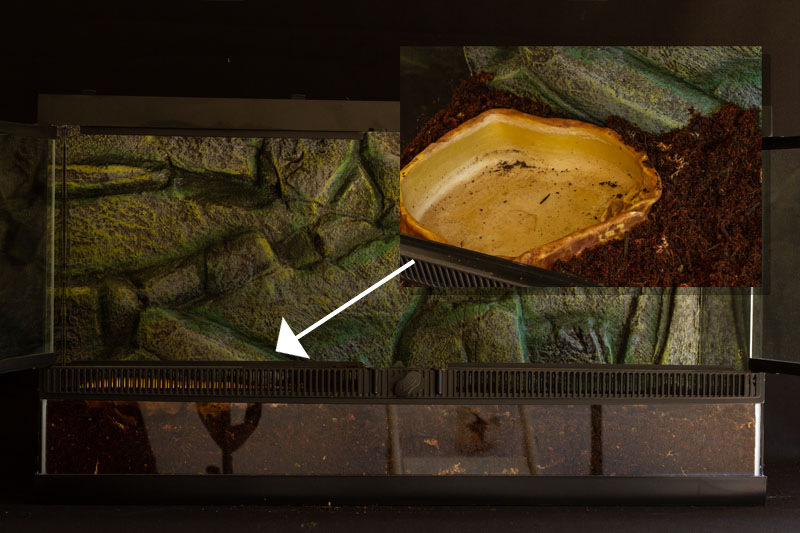
This step is optional but I recommend using a water dish. Be sure to use a sturdy dish! Also, it doesn’t need to be as deep as the one I used in the picture above.
It needs to be large enough for your Pacman Frog to fully enter but the water level should be shallow enough for your pet to sit in. I used an Exo Terra water dish (large).
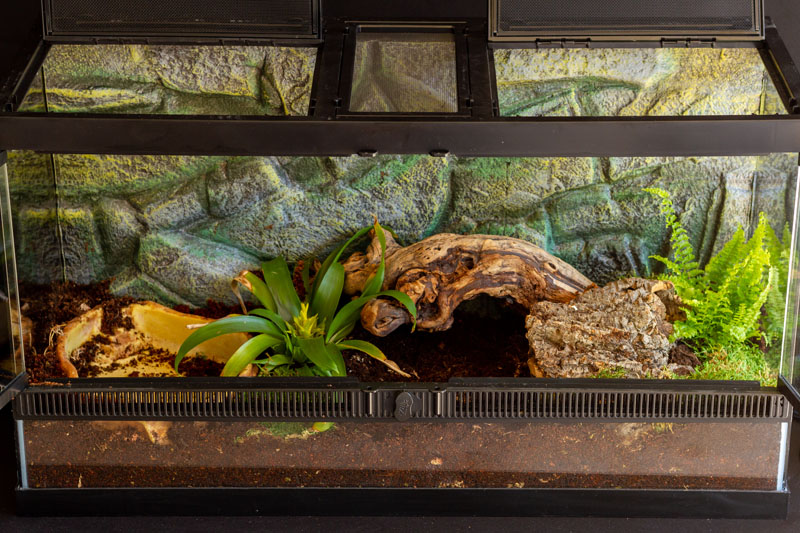
Step 4.) Plants & Decorations
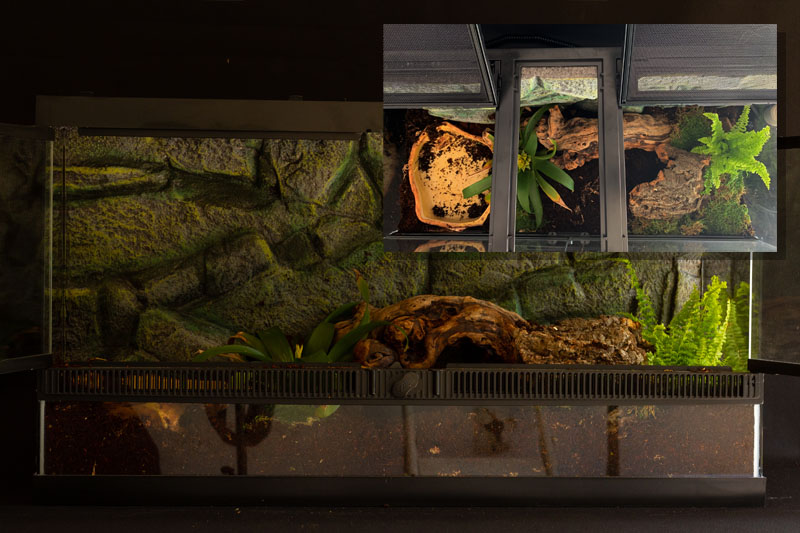
Now the fun part! You get to decide where to place your decorations. Use branches, plants, or anything that your Pacman Frog can’t get hurt on or stuck in.
I personally enjoy naturalist setups so I went with a Zoo Med grapevine, a large cork bark flat, a couple of plants, and some moss.
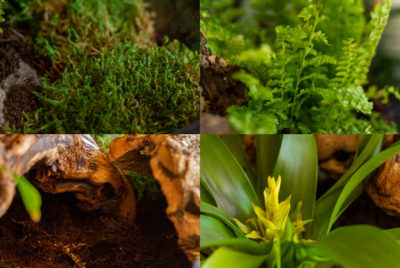
You can use fake plants if you prefer. Should you opt for real, living plants, keep in mind that you’ll need a substrate that provides nutrients for your plants to grow and you’ll most likely need a grow light as well!
Moss is a welcomed addition to any Pacman Frog enclosure. It soaks up water, which is great for keeping the relative humidity high within the enclosure.
Step 6.) Thermostat, Lighting, & Meters

The next step is to install your thermostat and supplemental lighting. Moreover, it’s time to set up a heat lamp if you’re not using a heating pad.
Setting up the Thermostat
Reptile Thermostats differ slightly but generally always include a plugin receptacle, a probe, and a dial or digital display for programming.
- Plug your heating element into the thermostat’s plugin receptacle.
- Next, place the thermostat’s probe where you want to track the temperature.
- Finally, program the dial or digital display to turn off your heating element at a max temperature of 82 °F.
Placing the temperature probe is important and depends on the type of heating element you’re using.
For overhead heaters, like a heat bulb or ceramic heat emitter, place the probe directly under the heater and approximately 1 to 2-inches above the substrate. When the probe determines the temperature is at or above 82 °F, it will turn the heater off.
Supplemental Lighting
Pacman Frogs need a photoperiod of about 12/12. That means, 12 hours of light and 12 hours of dark. This can fluctuate slightly to 14 day-time hours and 10 night-time hours.
UVB is not required. However, that doesn’t mean amphibians don’t benefit from a low-powered UVB light. In fact, studies suggest they benefit from the correct amount of UV Index administered via UVB bulb in captivity. To learn more about this, check out my post: Do Pacman Frogs Need UVB?
If, on the other hand, you have an Albino Pacman Frog, avoid UVB altogether as it can be harmful to their eyes!
If you’ve got real plants in the tank, you’re going to need a grow light. The specific needs of your plants are not within the scope of this guide, so I would encourage you to do some research on this topic. My hobbyists have had success with LED bulbs!
T5 and T8 grow lights work exceptionally well, too! Just, again, please first read the Pacman frog lighting guide linked above.
Thermometer and Hygrometer
Perhaps one of the most important tools a herpetologist has is the thermometer and hygrometer. A thermometer read the temperature in a given location while a hygrometer read the humidity level.
I forgot to take picture of this step because it was getting late and I needed to move the enclosure to its permanent location. Moreover, it will be a while before I add the Pacman Frog to his new habitat (more on that in the next step).
I recommend spending at least $10 on a decent digital thermometer hygrometer combo meter. The super cheap $3 meters are virtually worthless, being off by 20% – 30% relative humidity at times. In the world of reptile and amphibian husbandry, that’s too much.
Anyway, place the thermometer and hygrometer combo meter where you can see it. Many of them have a separate probe attached by a wire. Some have two; one for the temperature and the other for the humidity. Place the probe where you want the reading.
Step 7.) Misting and Waiting
For non-bioactive setups, all that’s left is to ensure the heating element, thermostat, and meters are working correctly and that the habitat is suitable for your Pacman Frog. Mist the enclosure, perform a once-over to make sure everything is good, then place your frog in their new enclosure.
If you’re using real plants or creating a bioactive setup, you should wait a few weeks before introducing your frog to their new home! New England Herpetoculture recommends waiting 3 weeks [1].
This allows your plant’s roots to establish. Also, it gives enough time for your microfauna (springtails and isopods) to become established.
Item List for this Pacman Frog Tank
As promised, I’m going to provide a list of the items I used in this build. Remember, I opted for a heat bulb. You can use a heat mat (UTH or “Under Tank heater) if you prefer.
| Item | Link |
|---|---|
| Zilla Front Opening Terrarium (30″ x 12″ x 16″) | Amazon → |
| Vivosun Reptile Heating Pad | Amazon → |
| Inkbird ITC-308 Thermostat | Amazon → |
| Zoo Med Clamp Lamp | Amazon → |
| Zoo Med Thermometer / Humidity Guage | Amazon → |
| Exo Terra Water Dish | Amazon → |
I truly hope this guide has helped you! If you have any questions, feel free to ask in the comment section below!
References
- New England Herpetoculture. (n.d.). NEHERP – Vivarium Construction 101 – The most complete vivarium building articles online! Retrieved August 22, 2021, from https://www.neherpetoculture.com/vivariumconstruction101[↩]